How To Install Mainwp Dashboard App On Cloudways Hosting
Recently, Cloudways started offering WordPress with a pre-installed MainWP Dashboard plugin as an option for quick deployment. For new Cloudways users that sign up for the account by going through the MainWP Hosting page, the option is included by default. However, if you already are a Cloudways user, you may need to reach out to the Cloudways support department and have them enable this option for you.
A domain name is not needed for hosting your MainWP Dashboard on Cloudways managed hosting.
To quickly deploy WordPress (with MainWP) Application on your new Cloudways account:
- Go to the MainWP Hosting page and click the Get Started Here button
 This step is crucial because only MainWP referred users that sign up for the account will have this option enabled by default.
 - Signup for Cloudways Account
- After successful registration, log in to your account
- Go to the Applications section

- Click the Launch button

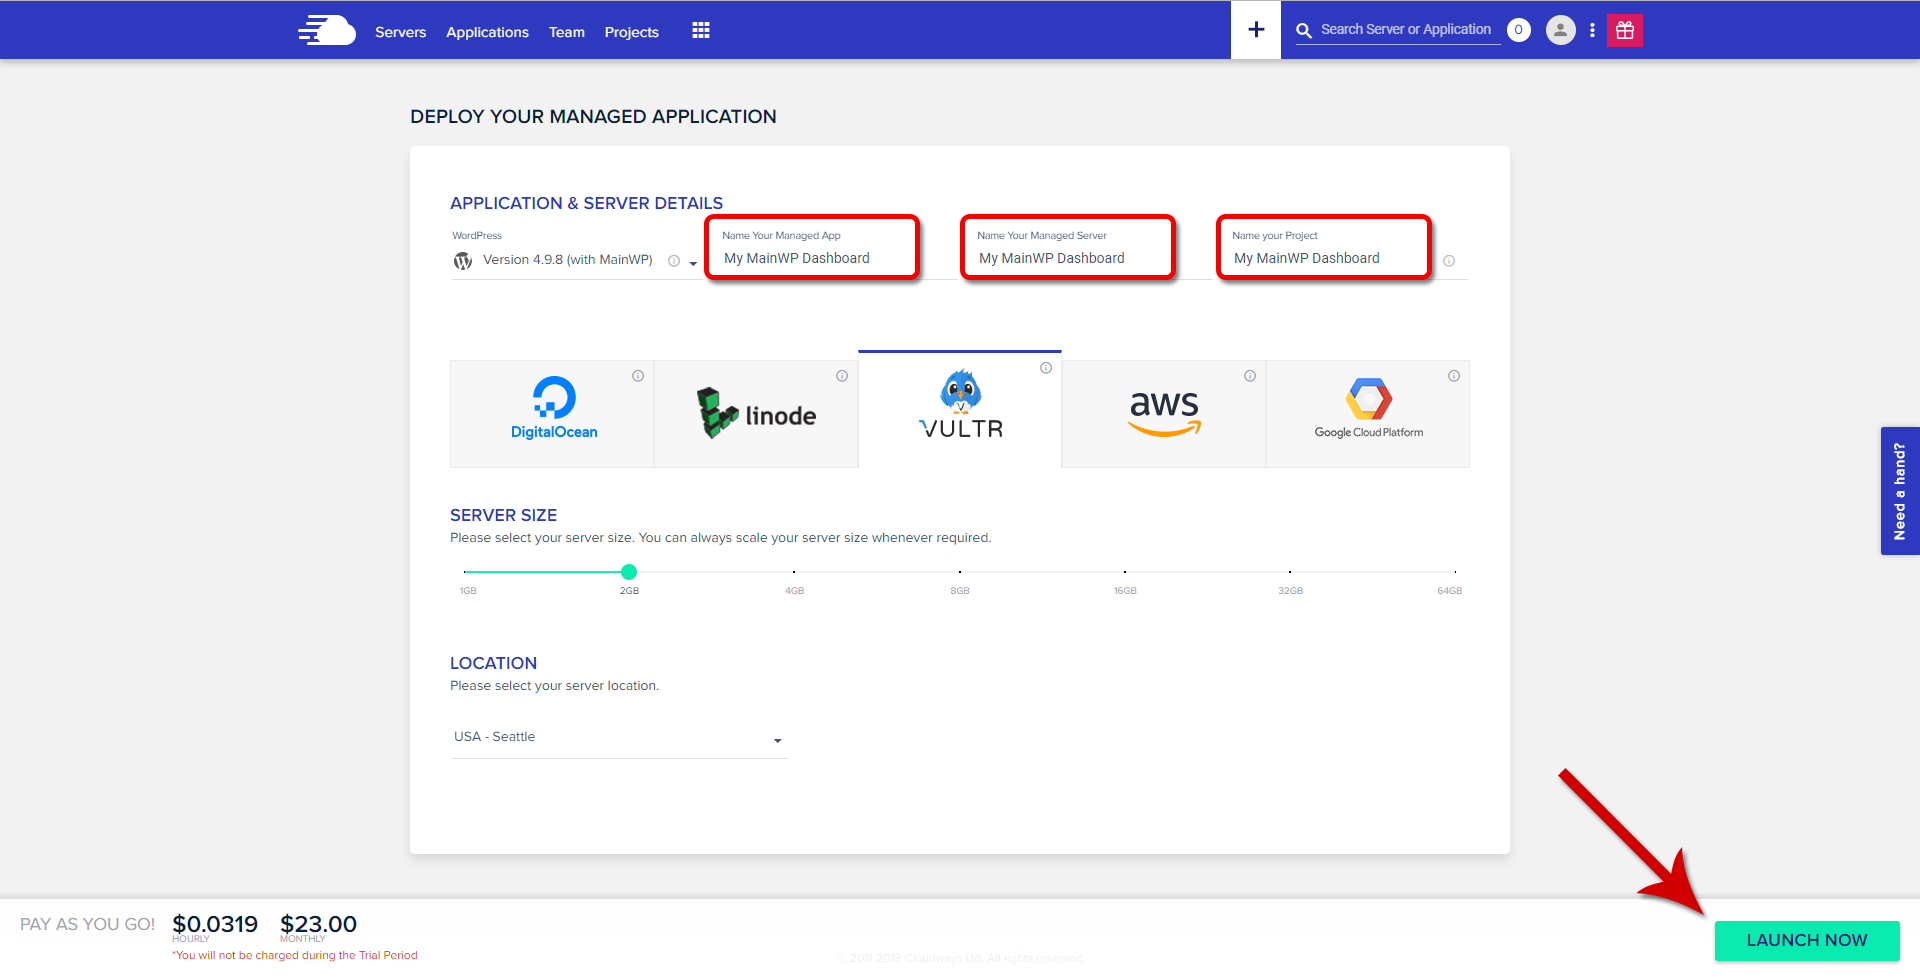
- Next, on the Application & Server Details page, set your Server Preferences (in this help document, we chose the Vultr, but you can select any of the provided options)

- From the Application menu, choose WordPress (with MainWP)
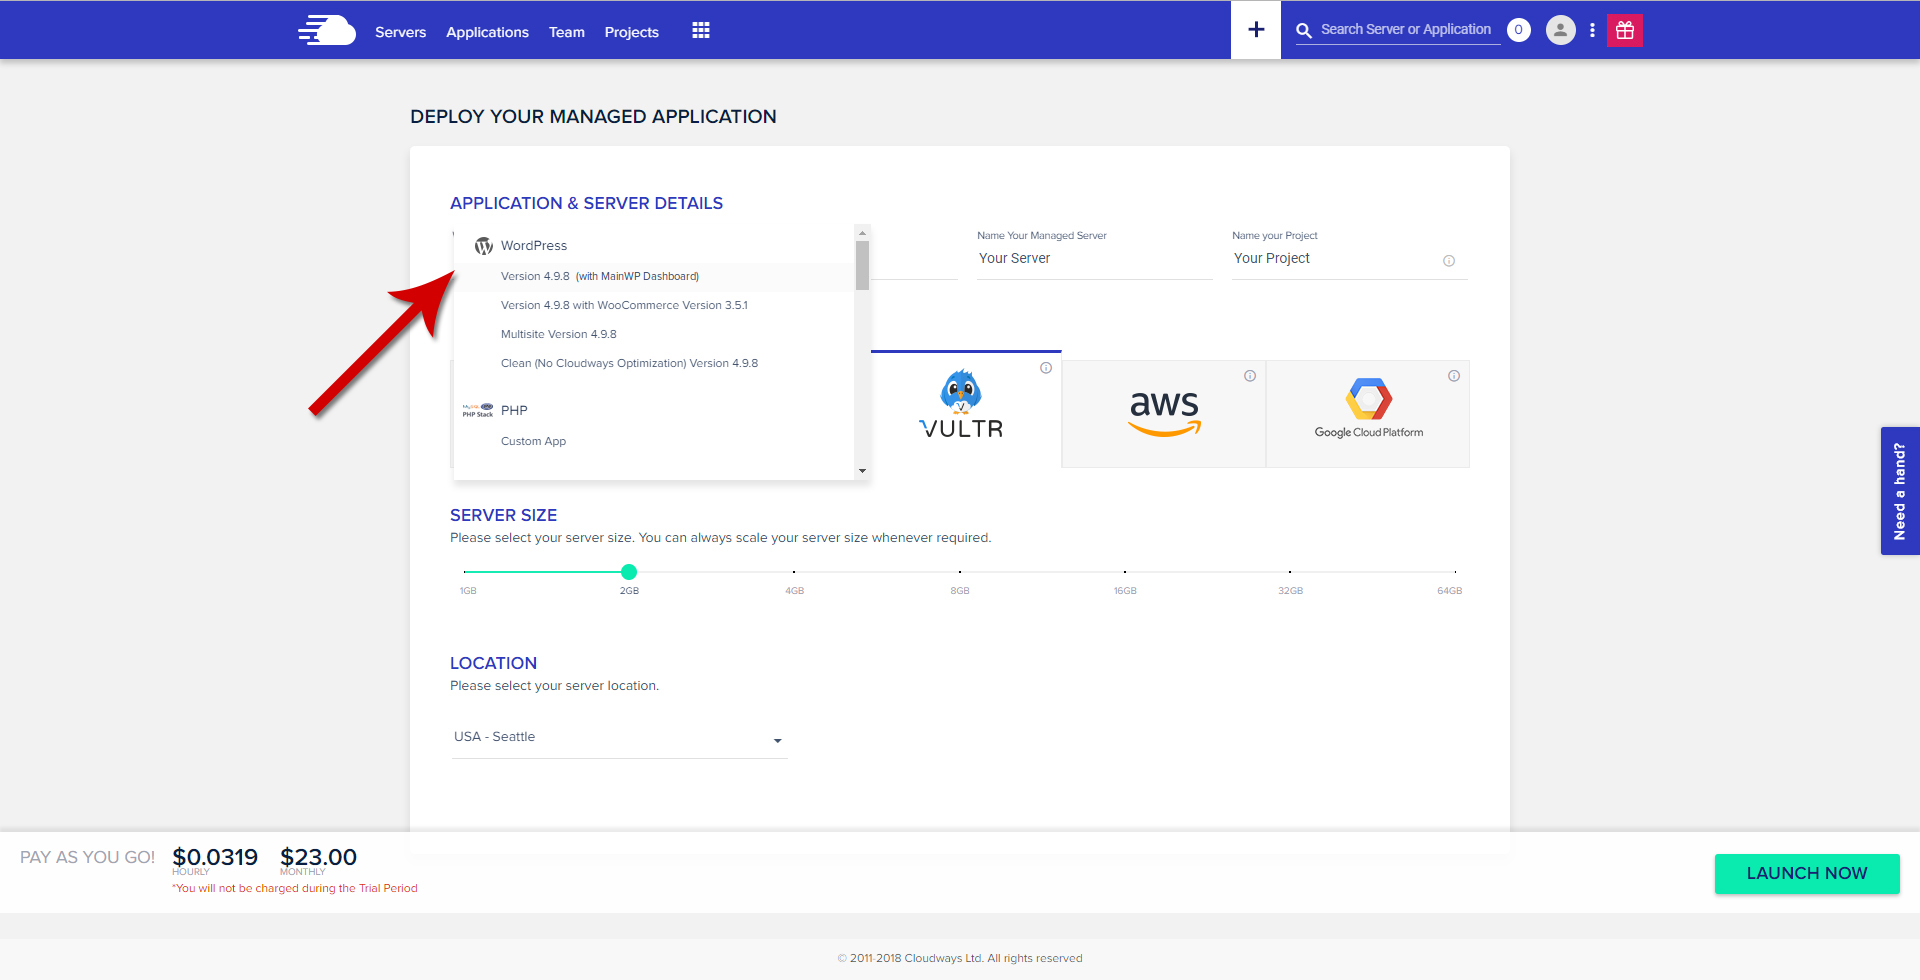
- Name your managed Application, Server, and Project and click the Launch Now button
- The process will start immediately, and it can take up for a few minutes for the server to get created
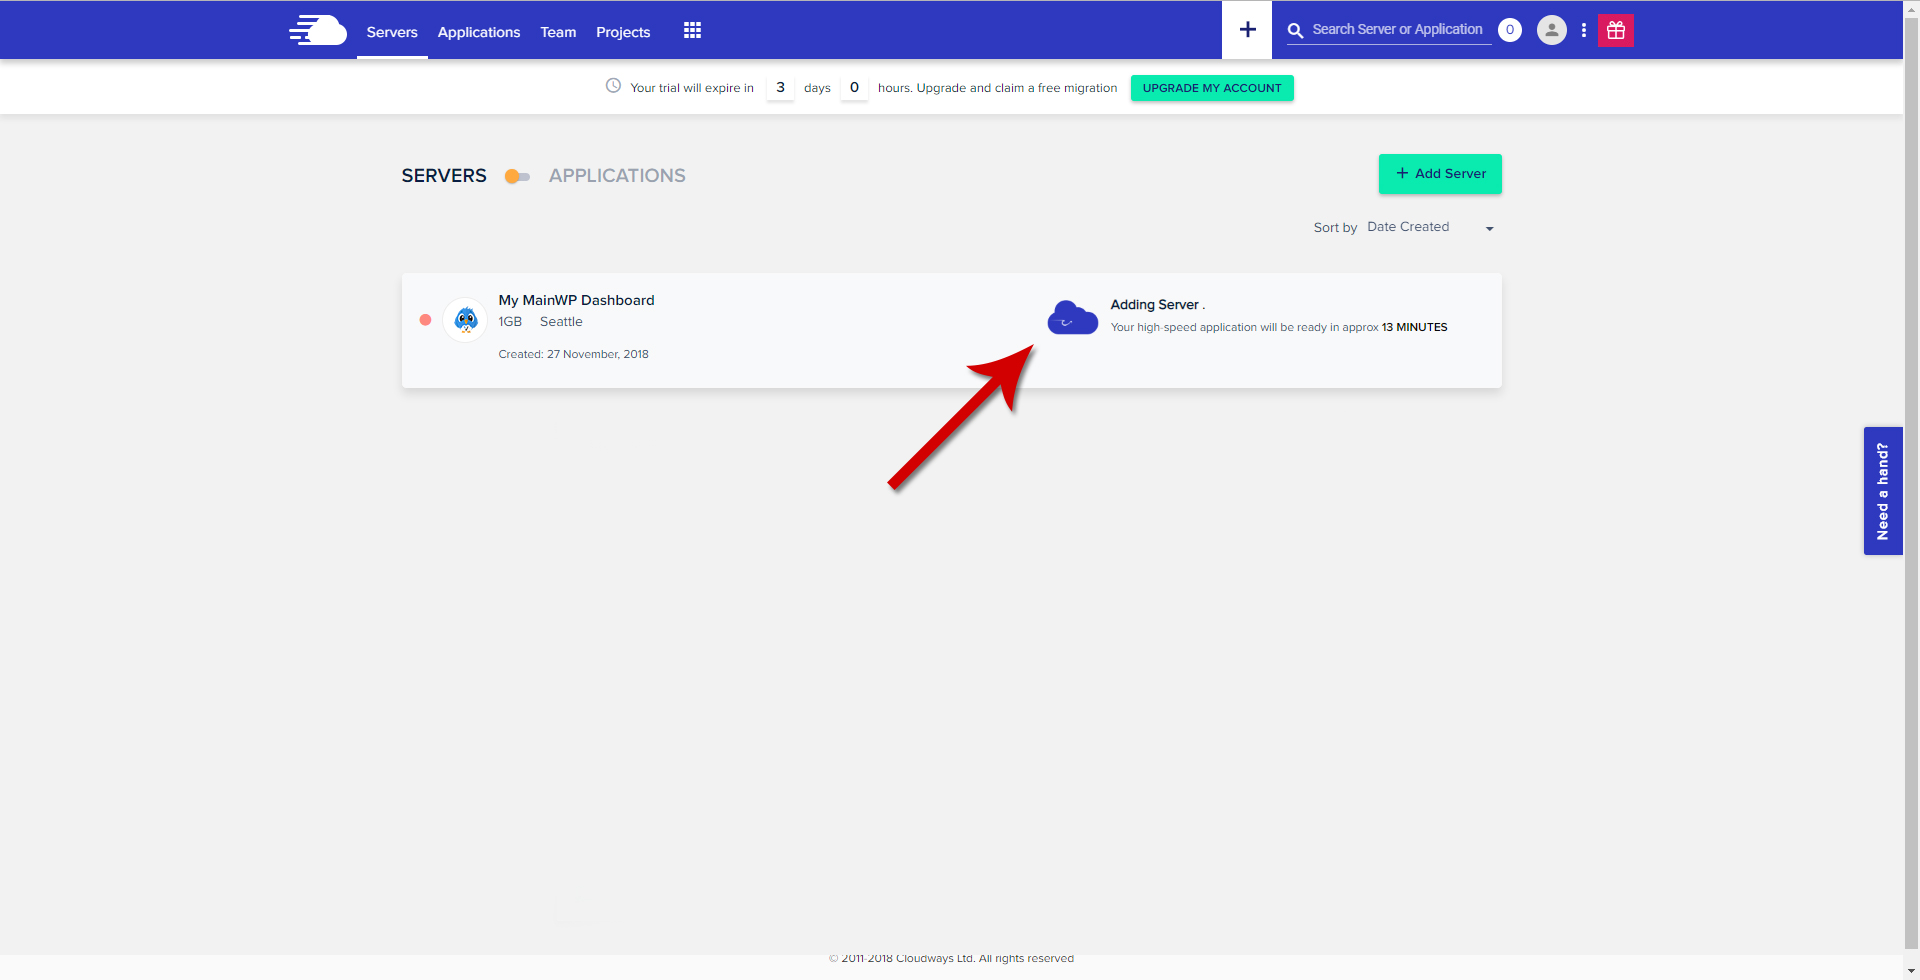
- Once the process gets completed, click on your applications (www)

- Your MainWP Dashboard application will show up in the popup list. Click on it.

- Use the Admin Panel info to access the application
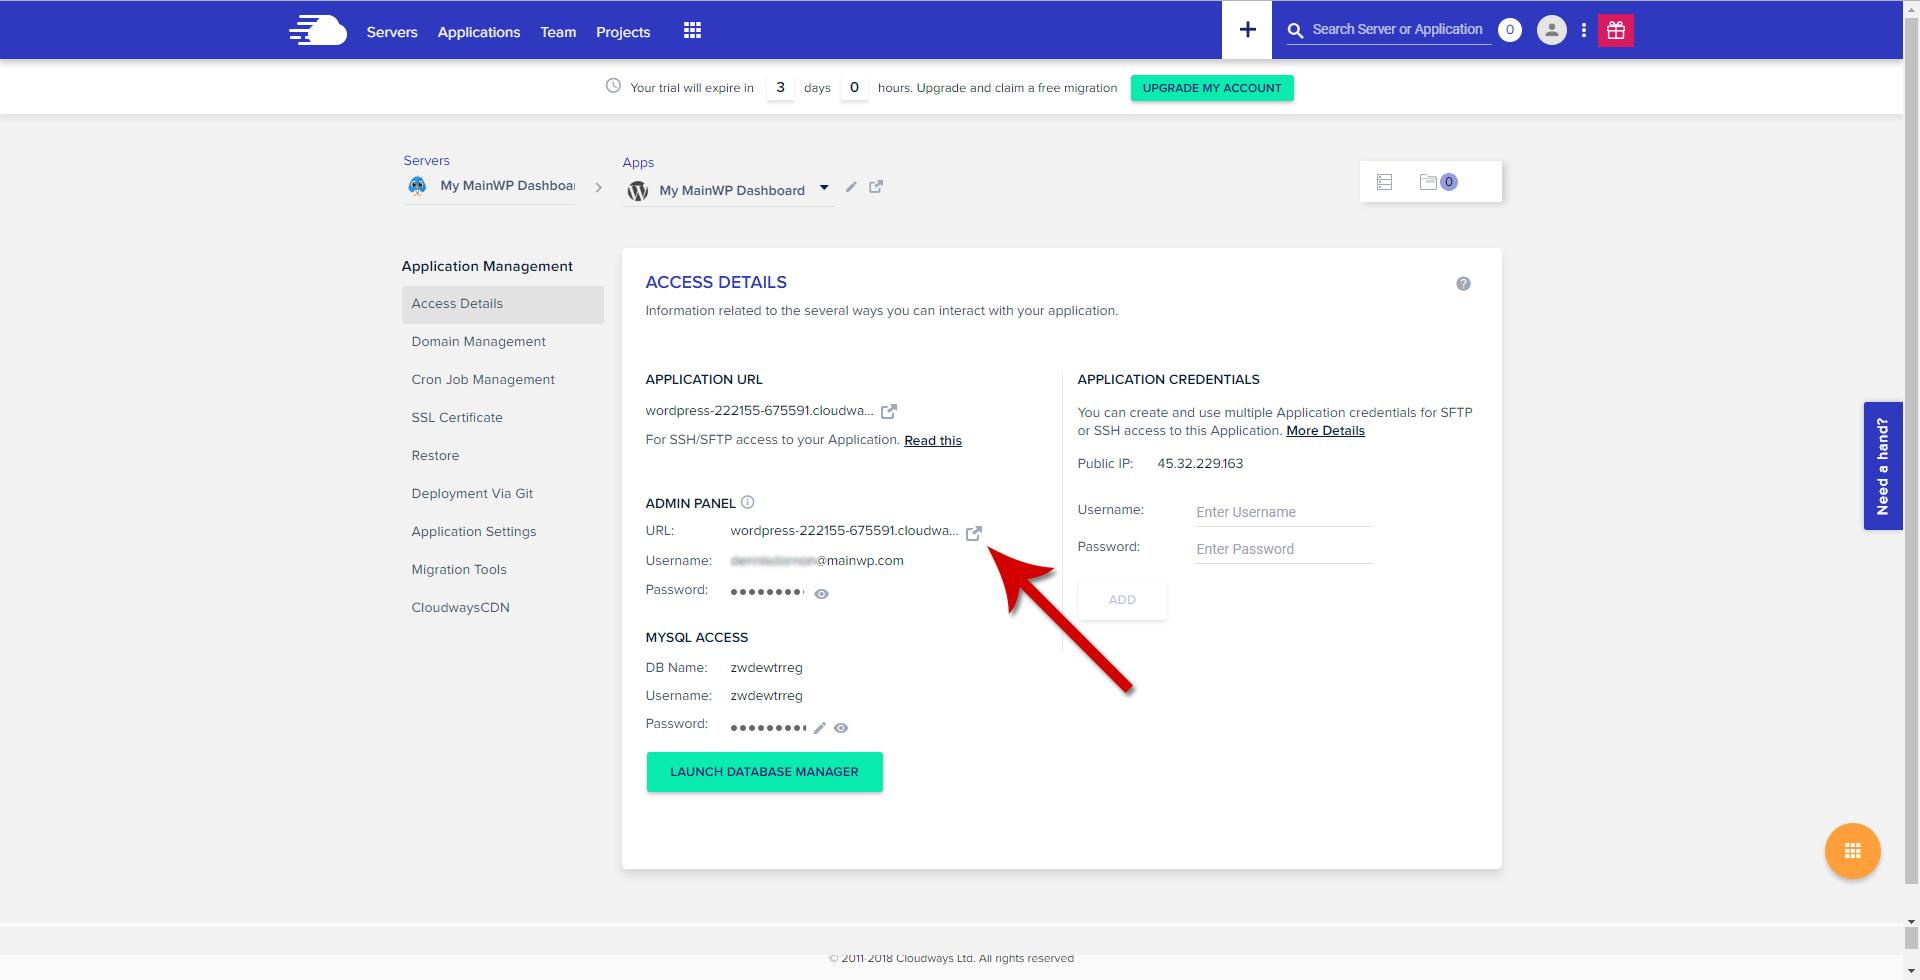
- Use the Username and Password provided in the Admin Panel info to access the website
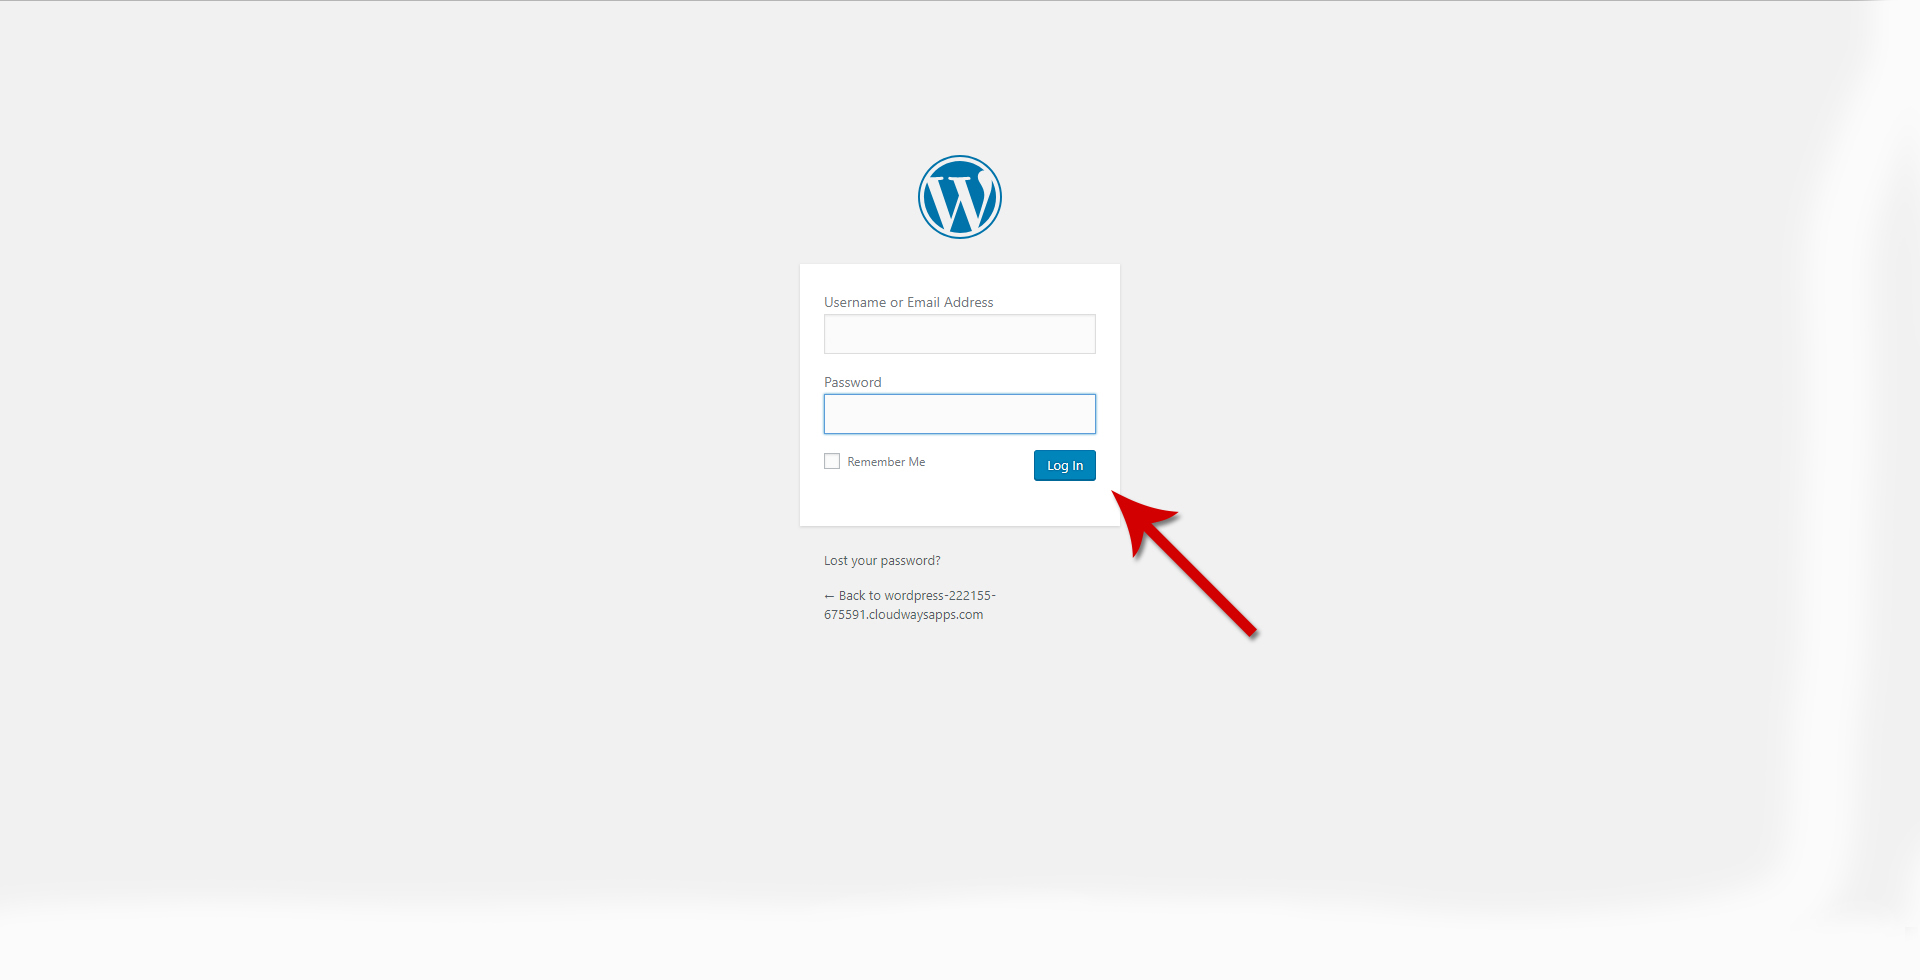
- After you log in, you will be prompted to the MainWP Quick Setup Wizard. Click the Let's Go button to get started

- On the Installation step, choose Web host and click the button to Continue
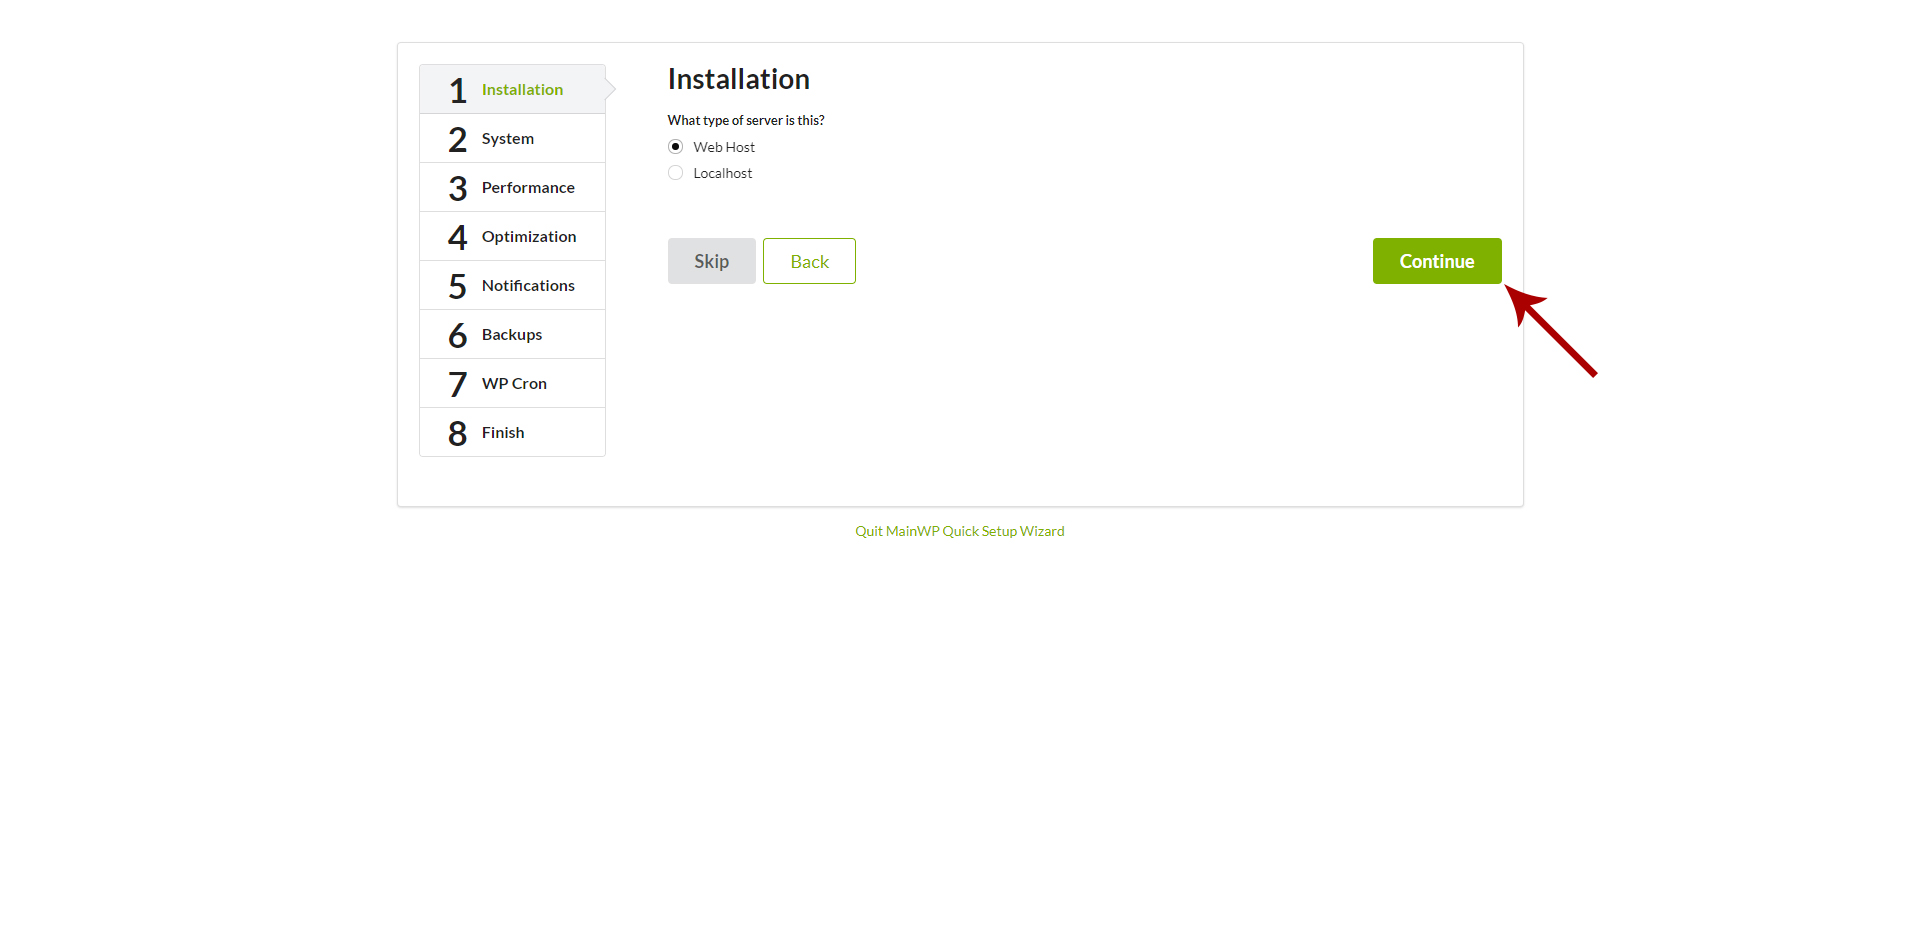
- In the next step, you will be able to verify that the system requirements are met

- Proceed with the Quick Setup Wizard until you complete it (For the additional help with the Quick Start Wizard, please check this help document)
- Once complete, go to the WP Admin > Plugins page and check if there is a newer version of the MainWP Dashboard plugin available
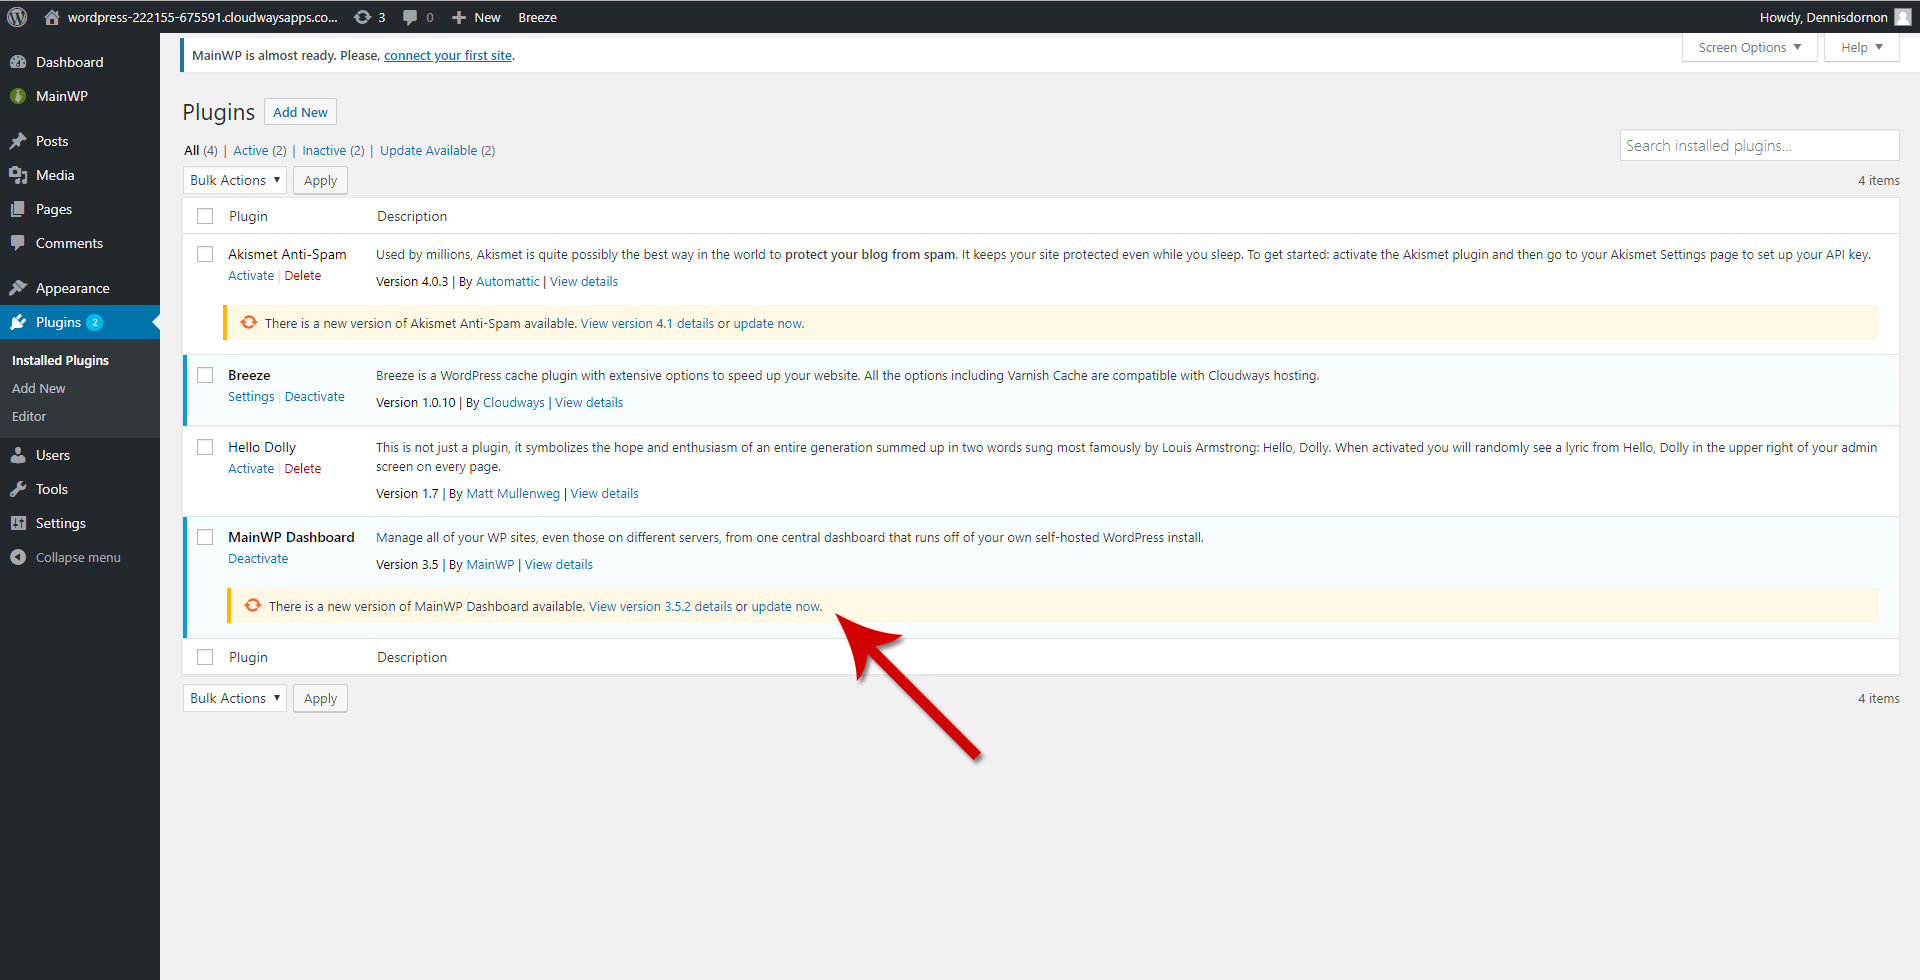
- If yes, update the plugin, and you are ready to start using your MainWP Dashboard.
If you already have a Cloudways account, you may be missing the
WordPress (with MainWP) option in the applications menu. In this case, please feel free to contact Cloudways support, and they will be able to enable it for you.
If you already have MainWP Dashboard hosted on a different hosting and want to move your sites to the new MainWP Dashboard set on the Cloudways, you can quickly
Export your child site and with the exported file,
import your sites to the new MainWP Dashboard. For the additional server fine-tuning,
please check this article.