Create Report
Default Reports
MainWP Client Reports Extension comes with three default Reports:- Default Basic Report - Clean report without custom style that provides basic info about performed actions on child site.
- Default Full Report - Clean report without custom style that provides full info about performed actions on child site.
- MainWP Client Report - Custom designed report that provides the most useful information about performed actions on the child site.
- Locate the wanted report
- Click the Edit link in the action row
- Locate the Report Settings section
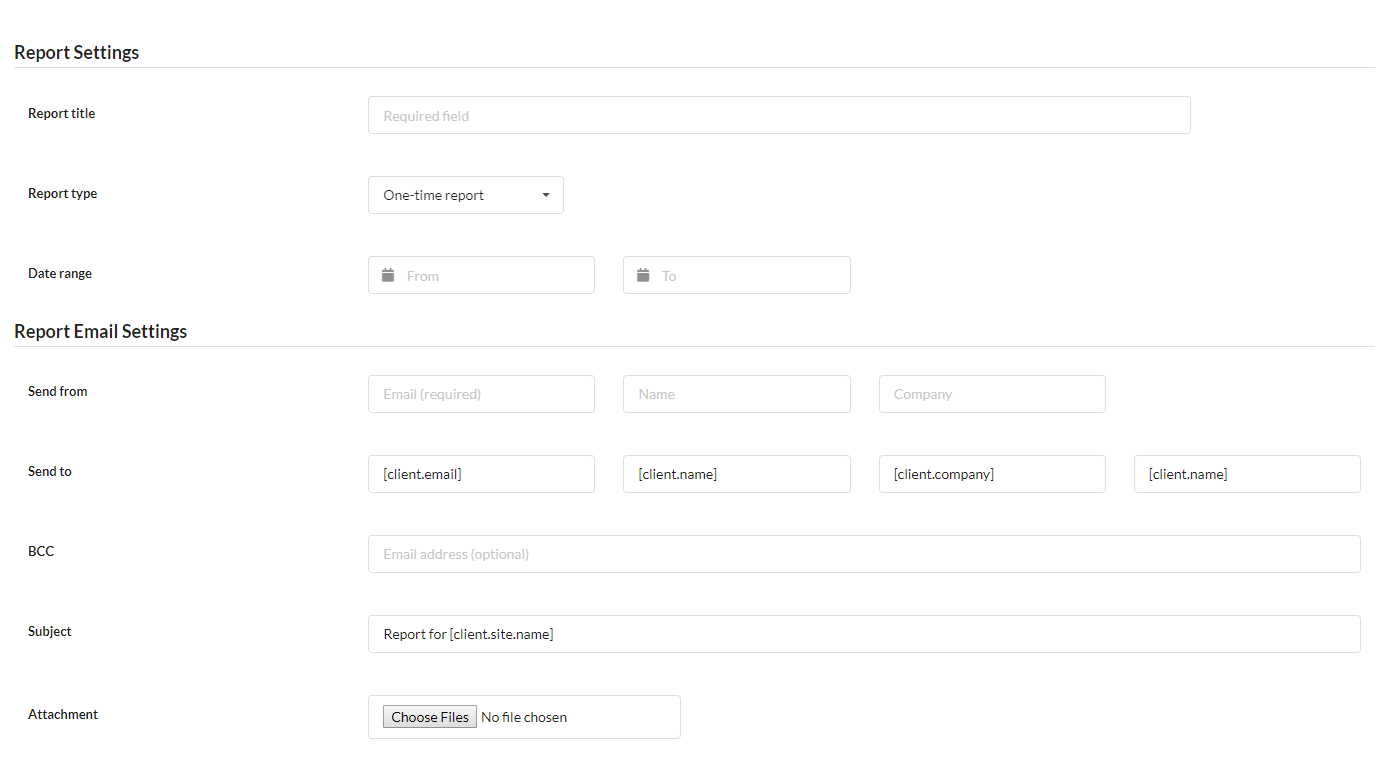
- The Title field allows you to change the default report title.
- The Type option allows you to set if you want to send the report Manually or to Schedule the report.
- The Date Range allows you to set the wanted date range for the report
- The Send From a group of fields will enable you to set wanted details. The Email address is required.
- The Send To a group of fields allows you to set details of the recipient. By default, client tokens are placed instead of actual values. The tokens will be replaced with the actual values that you have set in the Client Tokens section for the selected child site. It is not required to use these tokens, so if needed, you can manually add wanted values.
- If needed, the BCC field will allow you to add the BCC email address for the report.
- The Subject field allows you to add custom email Subjects for the report.
- If needed, you can attach files to the email by using the provided Attach File option.
- Select wanted Child Site(s)
- In the Report Format section, review the report content and, if needed, make wanted adjustments.
- If you want to Preview the report before sending it, click the Preview button. Also, if you're going to see how the email will look, you can use the Send Test Email button, and the report will be sent to your email address so you can review it before submitting it to your client.
- If this is a "one-time-report," click the Send Report button. If scheduled, click the Schedule Report button.
Edit Default Reports
If you want to use one of the default reports but you need to make some changes, you are allowed to edit report settings. However, to have the default reports always available, we recommend using the Replicate action and editing the report replica. To do that,- Login in to your MainWP Dashboard
- Go to the MainWP > Extensions > Client Reports > Reports page
- Locate the wanted Report
- Click the Duplicate link in the action row

- Once the report is replicated, click the Edit link in the Action row of the report replica.
- Locate the Report Settings option box
- The Title field allows you to change the default report title.
- The Type option allows you to set if you want to send the report Manually or to Schedule the report.
- The Date Range allows you to set the wanted date range for the report
- The Send From a group of fields will enable you to set wanted details. The Email address is required.
- The Send To a group of fields allows you to set details of the recipient. By default, client tokens are set instead of actual values. The tokens will be replaced with the actual values that you have set in the Client Tokens section for the selected child site. It is not required to use these tokens, so if needed, you can manually add wanted values.
- If needed, the BCC field will allow you to add the BCC email address for the report.
- The Subject field allows you to add custom email Subjects for the report.
- If needed, you can attach files to the email by using the provided Attach File option.
- Select wanted Child Site(s)
- In the Report Format section, review the report content and, if needed, make wanted adjustments.
- If you're going to preview the report before sending it, click the Preview button. Also, if you want to see how the email will look, you can use the Send Test Email button, and the report will be sent to your email address so you can review it before submitting it to your client.
- If this is a "one-time-report," click the Send Report button if scheduled, click the Schedule Report button.
Build Reports from Scratch
If you want to build a custom report from scratch,- Login in to your MainWP Dashboard
- Go to the MainWP > Extensions > Client Reports > Create Report page
- Locate the Report Settings option box
- The Title field allows you to change the default report title.
- The Type option allows you to set if you want to send the report Manually or to Schedule the report.
- The Date Range allows you to set the wanted date range for the report
- The Send From a group of fields will enable you to set wanted details. The Email address is required.
- The Send To a group of fields allows you to set details of the recipient. By default, client tokens are set instead of actual values. The tokens will be replaced with the actual values that you have set in the Client Tokens section for the selected child site. It is not required to use these tokens, so if needed, you can manually add wanted values.
- If needed, the BCC field will allow you to add the BCC email address for the report.
- The Subject field allows you to add custom email Subjects for the report.
- If needed, you can attach files to the email by using the provided Attach File option.
- Select wanted Child Site(s)
- In the Report Content section
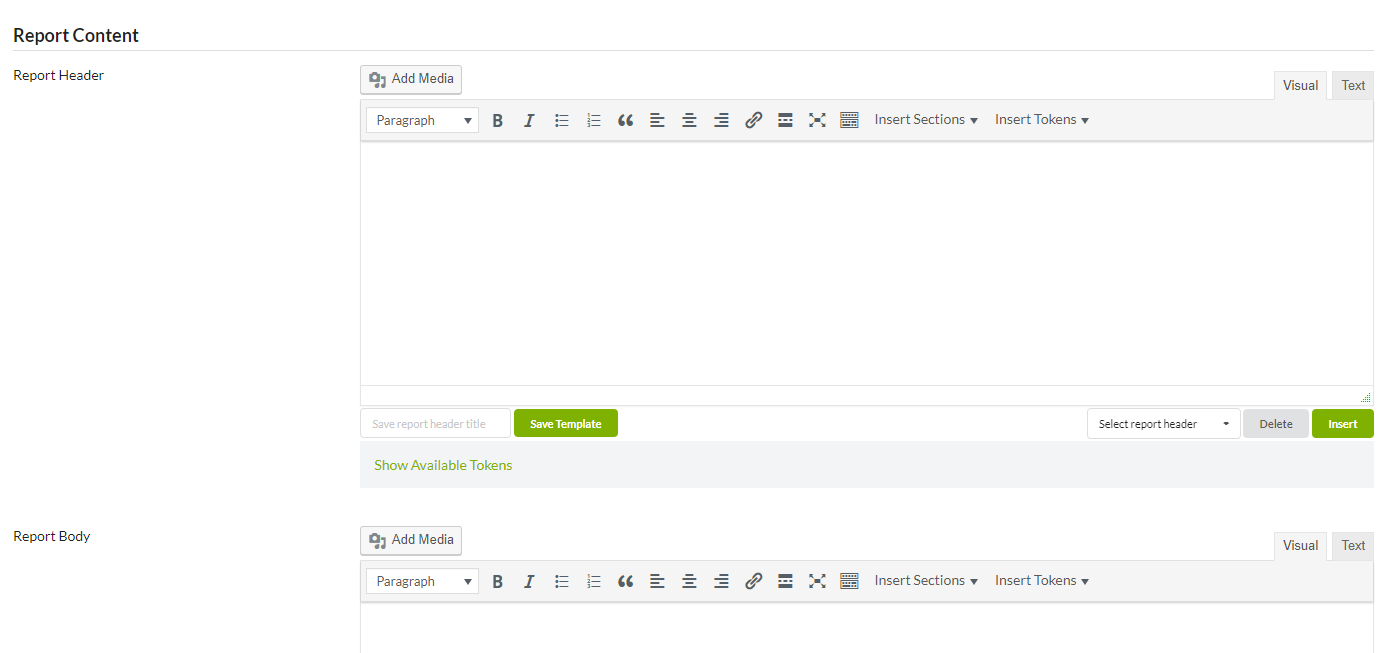
- Create report header
- Create a report body
- Create report footer
By using the system of available tokens format, the content of the report. Also, use the provided tools to insert tokens where you need them easily. - If you want to Preview the report before sending it, click the Preview button. Also, if you're going to see how the email will look, you can use the Send Test Email button, and the report will be sent to your email address so you can review it before submitting it to your client.
- If this is a "one-time-report," click the Send Report button. If scheduled, click the Schedule Report button.
Source Article:
https://kb.mainwp.com/docs/create-report/