MainWP Matomo (formerly Piwik) Extension Configuration
Matomo (formerly Piwik) Extension configuration requires two important steps:- Establishing Connection with your Matomo (formerly Piwik) Site
- Assigning sites from your Matomo Site to Child Sites in your MainWP Dashboard
1. Establishing Connection with your Matomo (formerly Piwik) Site
- Login in to your MainWP Dashboard
- Go to the MainWP > Extensions > Matomo > Settings page
- Locate the Connect Matomo (formerly Piwik) Dashboard section
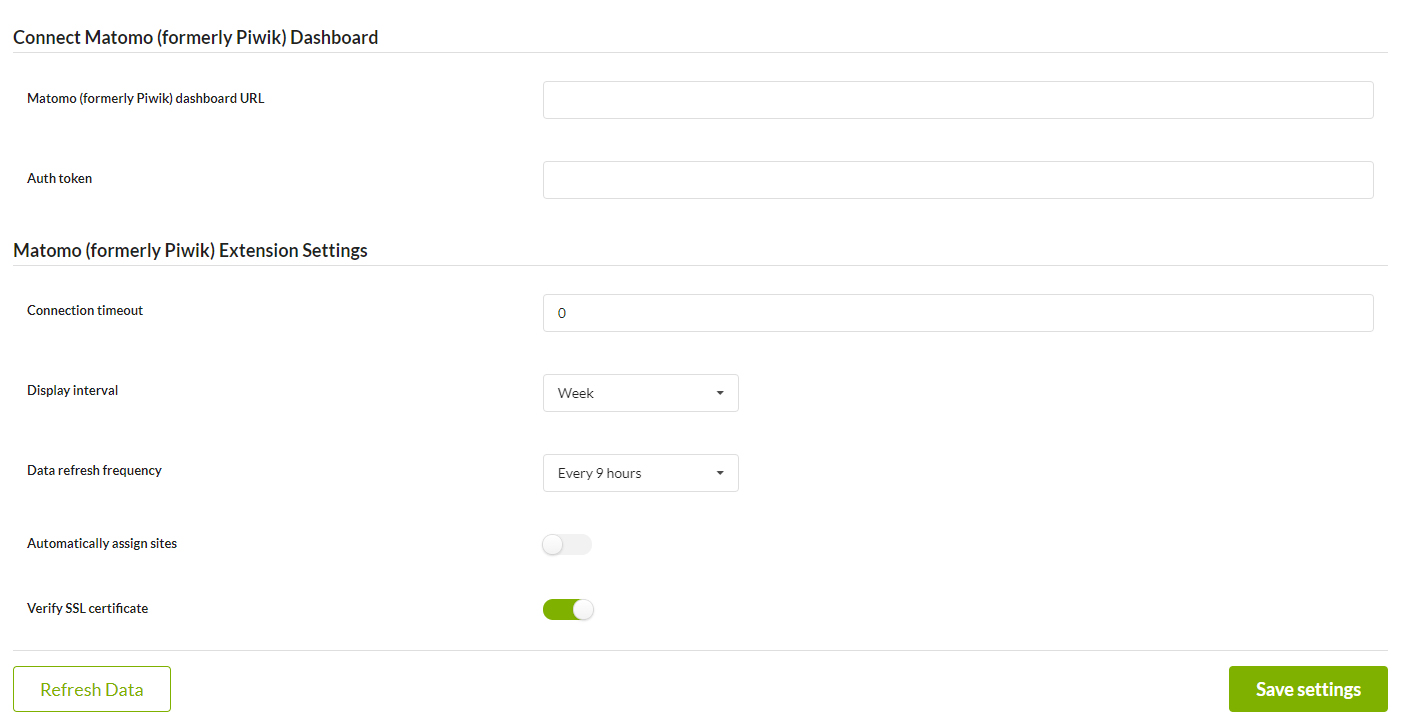
- Enter your Piwik Site (Dashboard) URL
- Enter your API Authentication Token (The API Authentication Token looks like this: c26364b7sfbb743f1xadea17f73c4132 (this is a sample number DO NOT use it in your installation). You can find your auth token in your Piwik Dashboard on the Personal > Settings > API Authentication Token page)
- Set the Connection Timeout Limit (We suggest 5-10 seconds)
- Set the Time Interval (Controls the visual time span of the Widget graph. You can view your sites for the past week or month)
- Set the Refresh Rate (Set how often you want to grab data from your MainWP Dashboard to update your reports)
- Click the Save Settings button
2. Assigning sites from your Piwik Site to Child Sites in your MainWP Dashboard
- Go to the MainWP > Sites > Manage Sites page
- Locate your first child site and click the Edit action
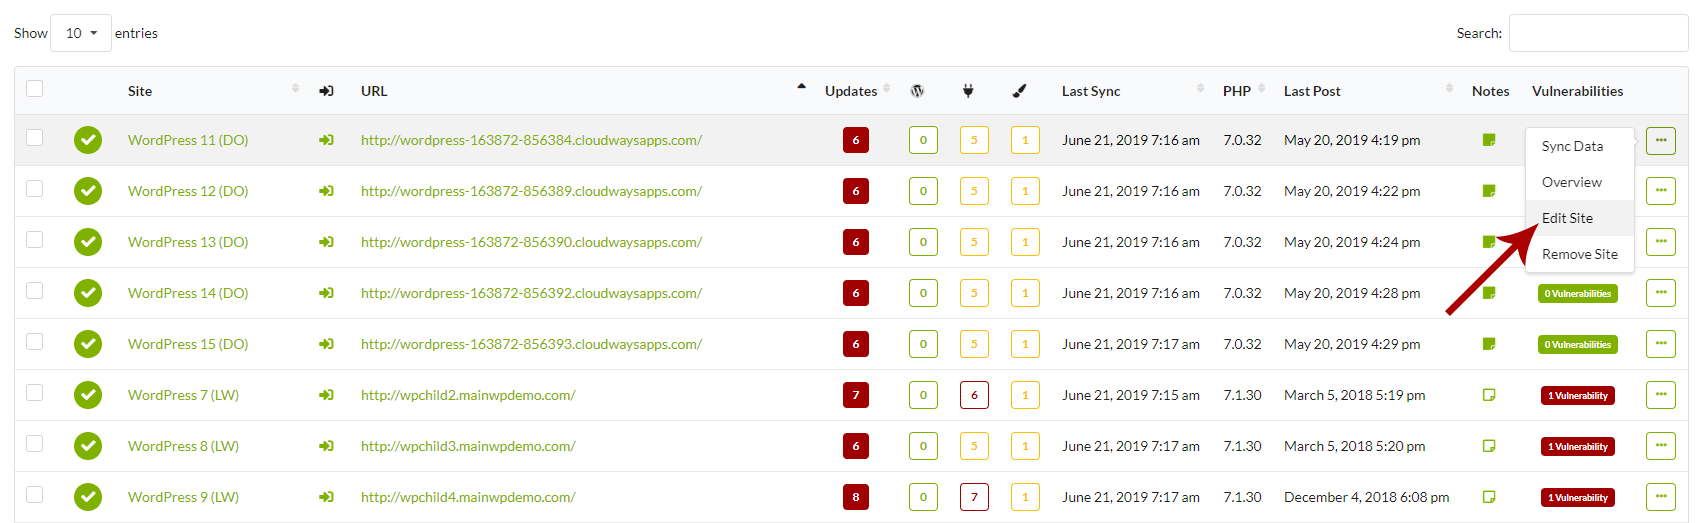
- Locate the General Options box
- Locate the Site from your Piwik account option and select the corresponding website

- Click the Update Site button
- Repeat the process for all your child sites
Source Article:
https://kb.mainwp.com/docs/mainwp-piwik-extension-configuration/